I originally wrote this guide in 2024 for the CruxAbyss team working on Echo-Land. It explains how to change a project, record the change with Git, and propose it for review on GitHub. The screenshots show the interfaces I used then; button positions and labels can change. A Chinese version follows below.
Git, GitHub, and repositories
Git is a distributed version-control system. It records commits: snapshots of tracked project content, together with metadata and links to earlier commits. It works with source code, documentation, and other files.
“Distributed” means that a normal full clone has its own repository and history. You can inspect history and make commits locally without contacting a central server. Collaboration is a benefit of that design, not the definition of distribution. Shallow and partial clones deliberately retrieve less data. See Pro Git's explanation of version control.
GitHub hosts Git repositories and adds issues, pull requests, reviews, and other collaboration tools. Git can be used without GitHub.
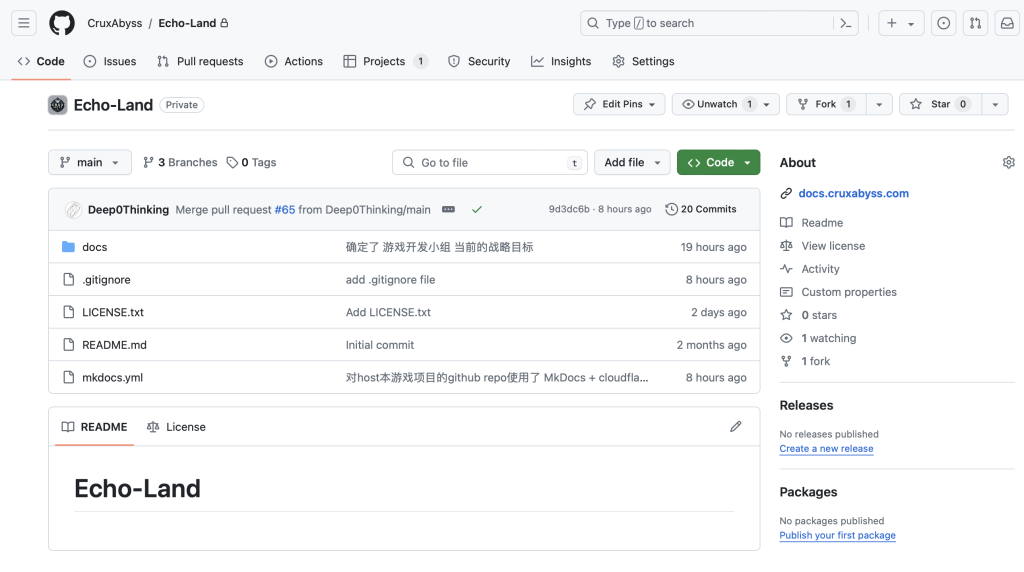
A repository contains versioned project content and its history. The local working directory is the copy you edit. Saving a file changes that copy; it does not create a commit or upload anything.
Issues and pull requests
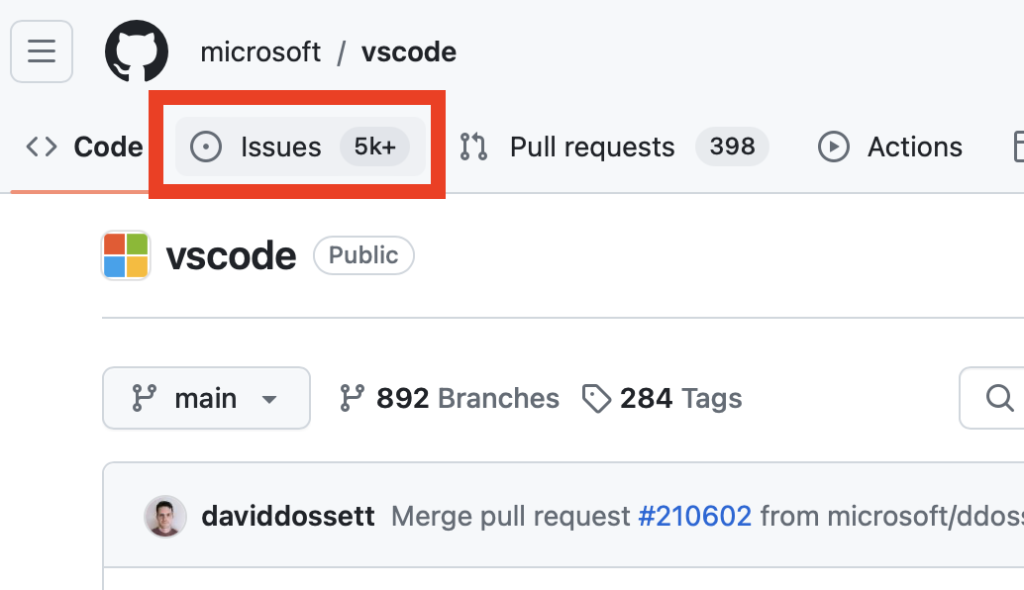
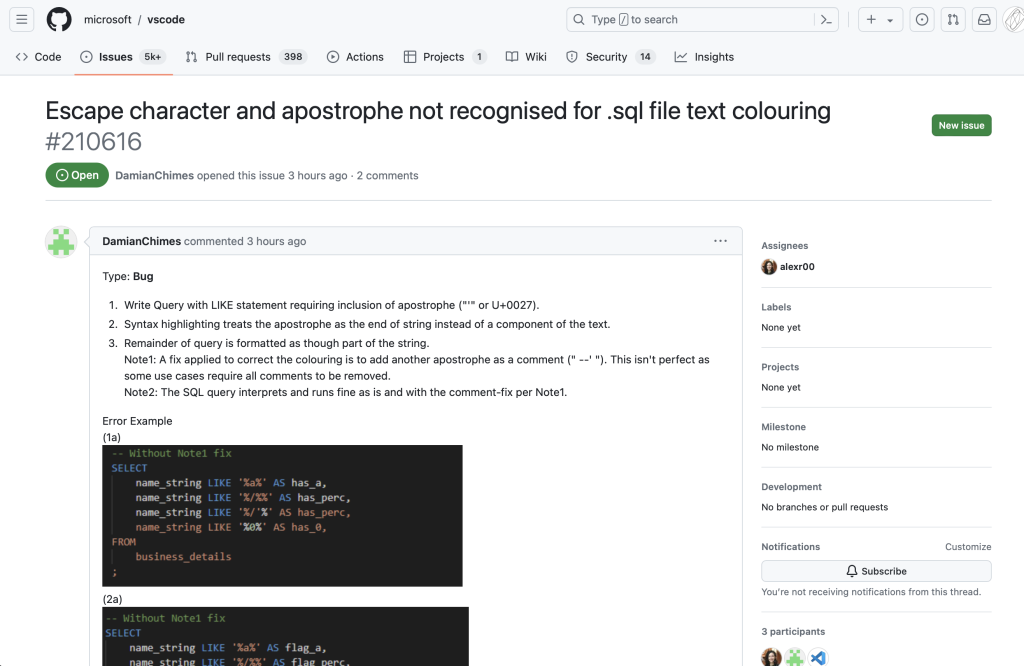
An issue records a problem, proposal, or task. A useful bug report explains the expected behavior, what actually happened, the relevant environment, and steps to reproduce it. An error after following a README may come from the code, instructions, environment, configuration, or an external service; its cause still needs investigation.
A pull request, or PR, proposes changes from a head branch into a base branch. Those branches may be in the same repository or in a fork and its upstream repository. A PR is a place to review a diff and discuss it before integration. Small fixes can have PRs, and draft PRs can invite feedback before work is complete. A PR is not restricted to major milestones. GitHub's creation guide explains the head and base choices.
Fork, clone, and branch
These operations serve different purposes:
| Operation | What it creates | Where |
|---|---|---|
| Fork | A separate repository associated with an upstream repository on GitHub | GitHub |
| Clone | A local Git repository and, normally, a working directory | Your computer |
| Create a branch | A new name for a line of development in a repository | Locally or on GitHub |
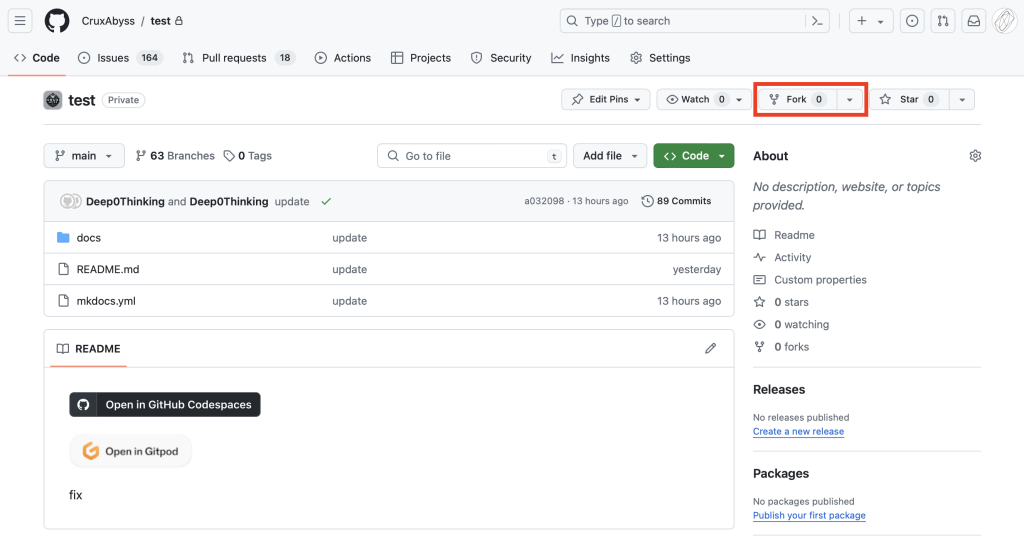
If you lack write access to a project, forking provides a GitHub repository you can push to. Cloning then brings a copy to your computer. If you already have write access, you can often work on a branch in the original repository without a fork.
A ZIP download is a snapshot of files and normally omits Git history. If you already edited a downloaded ZIP, the changes are not lost: clone the appropriate repository, create a branch, and carefully copy your edited files into it, excluding any .git directory. Then review the diff. There is no need to claim that everyone shares one identical repository; independent repositories with shared ancestry are central to Git.
A complete local workflow
For practice, use a repository you own or a project that welcomes practice contributions. The original team example was CruxAbyss/test.
- If necessary, create a fork on GitHub. Check its owner and repository name.
- Install Git, copy the fork's clone URL, and clone it. Replace the example URL and directory below with yours.
- Create a branch before editing.
git clone https://github.com/YOUR-ACCOUNT/YOUR-REPOSITORY.git
cd YOUR-REPOSITORY
git switch -c docs/clarify-readme
Open the folder in VS Code and make a small change to README.md. Save the file, then inspect, stage, and commit it:
git status
git diff -- README.md
git add README.md
git diff --cached
git commit -m "Clarify the setup instructions"
Staging selects the content of the next commit. If you edit a file again after staging, those later edits are not automatically part of the staged version. Reviewing git diff --cached shows what will actually be committed.
In VS Code, the Source Control panel offers the same operations: inspect the diff, use the plus button to stage selected changes, and enter a meaningful commit message. Colors depend on the theme and file status, so look at the labels rather than expecting a particular red icon. VS Code's source-control documentation describes the current interface.
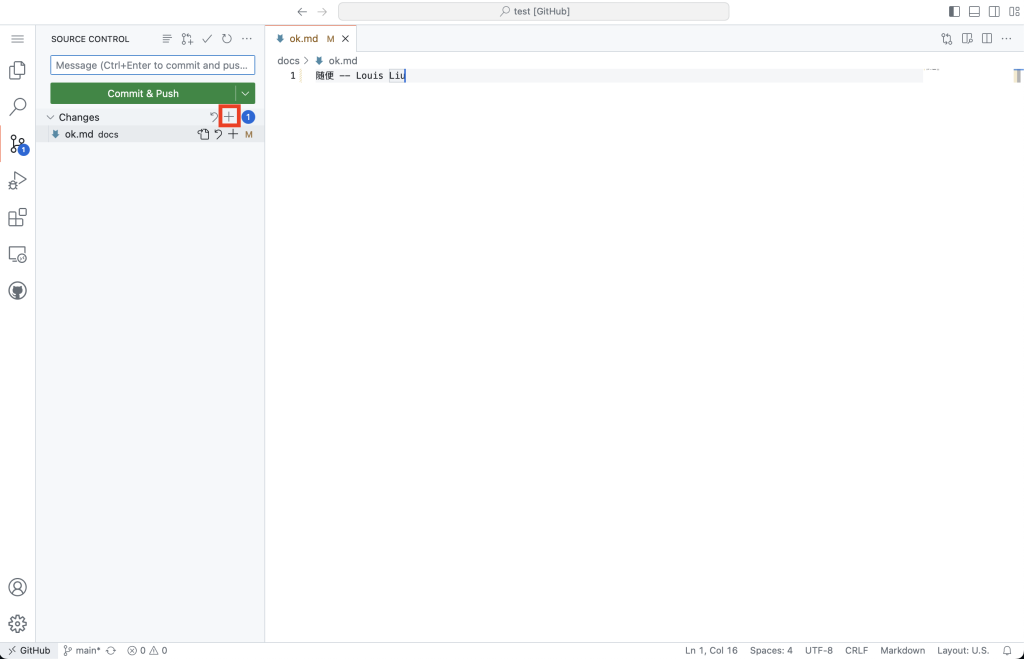
A local commit is still local. Publish the branch to your fork:
git push -u origin docs/clarify-readmeThis step requires authentication and write access to the remote. On GitHub, open a PR with the original project as the base repository and your published branch as the head. Choose the base branch specified by the project; do not assume its name is always main. Review the displayed diff, explain the change and how you checked it, and submit when it is ready for review.
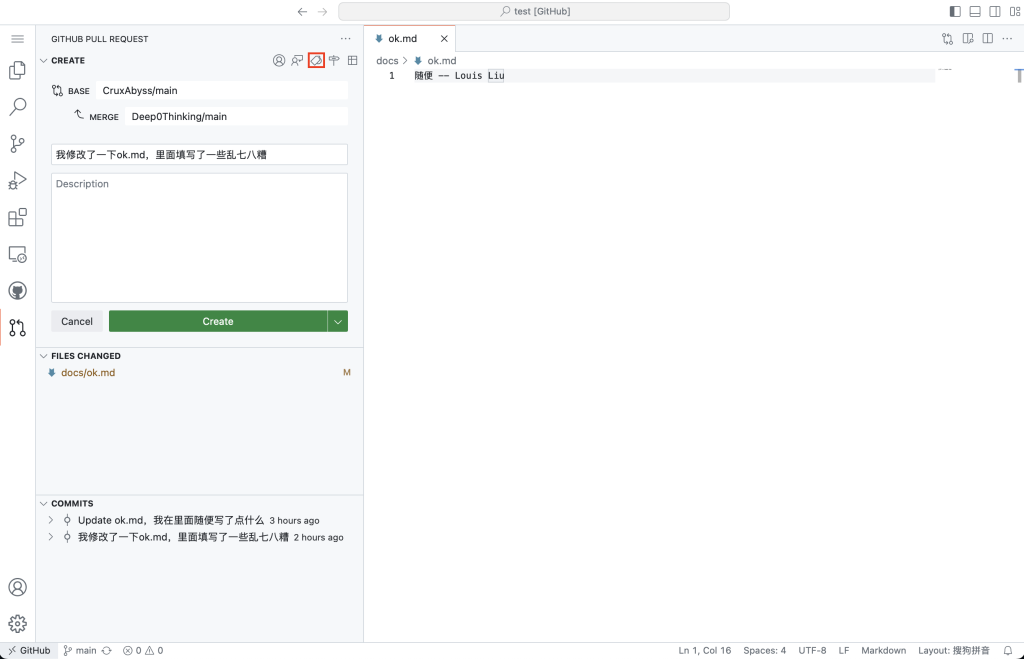
If reviewers request changes, commit them on the same branch and push again; the PR updates. Labels and review requirements depend on the project and your permissions. The Area labels and DevGuardian bot in the original team workflow were project-specific, not GitHub requirements.
Merging incorporates the proposed changes into the base branch. It does not automatically synchronize every branch in your fork. Your fork remains separate and can be updated from upstream when needed. Conflicts require resolving the competing edits and checking the resulting behavior.
Editing in the browser
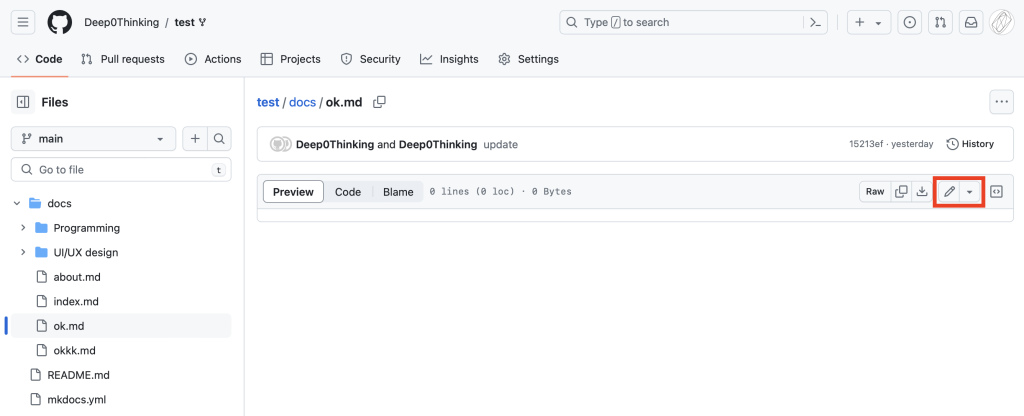
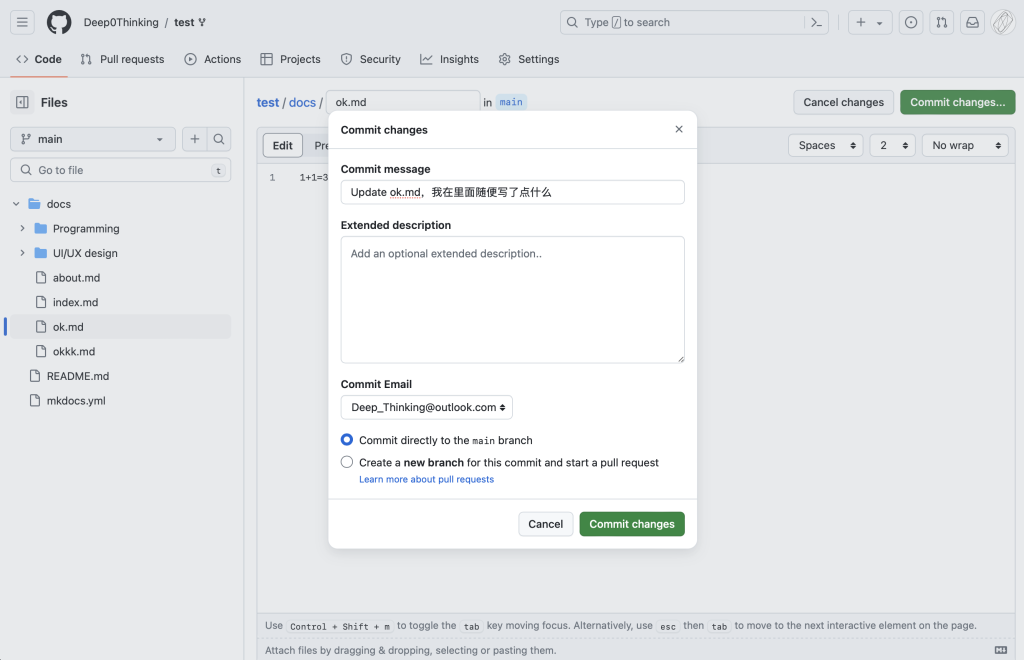
For a small documentation change, GitHub's file editor can avoid a local setup. Open a file, select Edit, make the change, and use the commit dialog to put it on a branch. If you lack write access, GitHub can guide you through a fork-based proposal. Review the resulting PR just as you would a locally created one.
The original guide ended with instructions for a team-specific LICENSE.txt signature. That was an onboarding procedure for the project, not a general GitHub step. For any current contribution, read the project's present README and contribution instructions.
中文版
这篇教程最初写于 2024 年,用于 CruxAbyss 的 Echo-Land 项目。截图保留了当时的界面;以下说明已修正旧文对 Git、fork 和 PR 的混淆。
Git 是分布式版本控制系统。通常的完整克隆拥有自己的仓库和历史,可以离线查看记录、创建提交。GitHub 则是托管 Git 仓库并提供 Issue、PR、审核等功能的平台。多人协作是 Git 的用途之一,但“分布式”并不只是“支持多人协作”的意思。
Issue 用来记录问题、建议或任务。报告错误时,应说明预期结果、实际结果、环境和复现步骤。照着 README 操作后报错,并不能直接证明一定是仓库代码有问题,还需要排查依赖、配置等原因。
PR(Pull Request) 是把一个分支的改动合入另一个分支的请求。两个分支可以在同一仓库,也可以分别在 fork 和上游仓库中。小修改也可以提交 PR,尚未完成的工作可以创建 draft PR 征求意见,不必等到整个里程碑完成。
Fork、clone 和 branch
- Fork:在 GitHub 上创建与上游有关联的独立仓库,不会直接下载到电脑。
- Clone:把仓库克隆到本地,通常包括历史和工作目录。
- Branch:为一条开发线创建分支,便于隔离修改。
没有上游写入权限时,通常先 fork,再 clone 自己的 fork;有权限时,也可以直接在原仓库中建立分支。下载 ZIP 通常不含 Git 历史。如果已经修改了 ZIP 中的文件,可以先正常 clone、建分支,再把修改过的文件复制进去并检查差异;不要覆盖 .git 目录。
从修改到提交审核
上面的命令展示了完整流程:clone 后用 git switch -c 建分支;保存修改后,先用 git diff 检查,再用 git add 暂存;用 git diff --cached 确认暂存内容,最后 git commit。
保存、暂存、提交和推送是四个不同步骤。保存只修改工作目录;暂存选择下一次提交的内容;commit 记录本地历史;push 才把提交发送到远程。暂存后再次编辑文件,需要重新暂存才能把新改动加入同一次提交。
在 VS Code 的 Source Control 面板中也可以完成这些操作。提交说明应写清具体改动,例如“补充启动步骤”,而不是只有“修改”。推送分支后,在 GitHub 中确认 PR 的 base 是正确的目标仓库与分支,head 是自己的改动分支,再检查 diff、填写说明并提交。
审核期间,在同一分支继续 commit、push,PR 会随之更新。合并 PR 会更新目标分支,但不会自动同步自己 fork 中的所有分支。冲突需要结合双方意图处理,并重新验证结果。
网页编辑器适合较小的文档修改,也可以通过提交对话框建立分支并提出 PR。旧教程中的 Area 标签、DevGuardian Bot 和 LICENSE.txt 签署属于当时的项目流程,不能当作所有 GitHub 项目的通用规则。参与项目时,应以其当前的贡献说明为准。